30-Amp vs 50-Amp RV Wiring Guide 2026: Complete Comparison
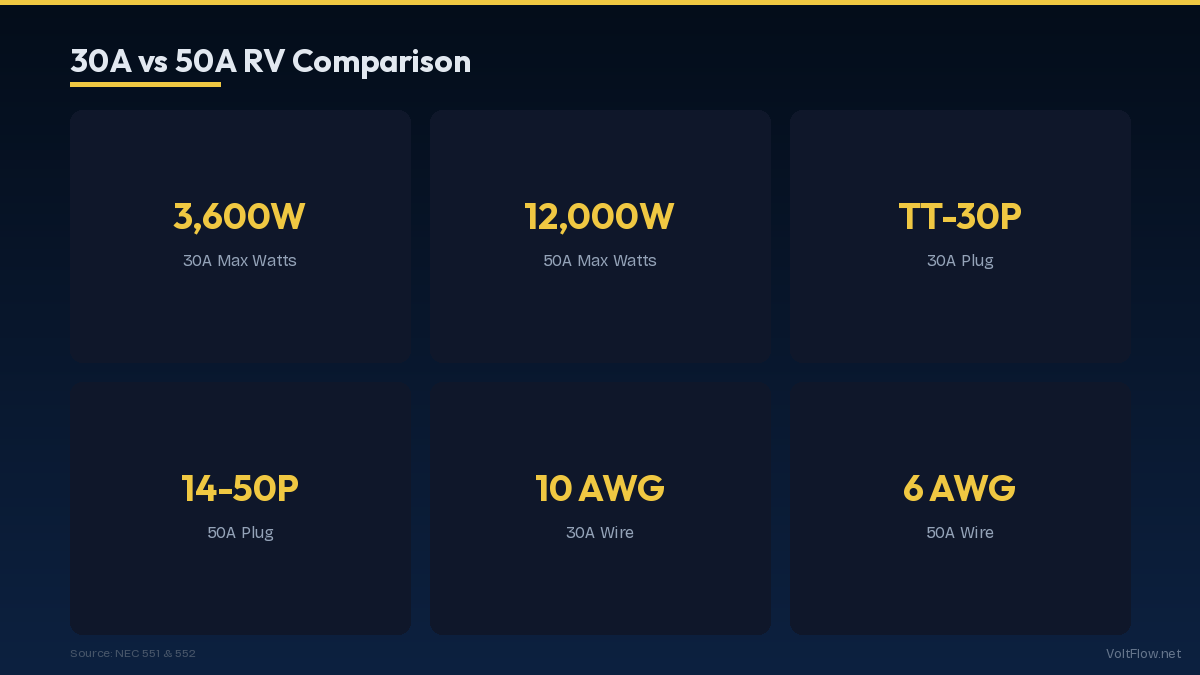
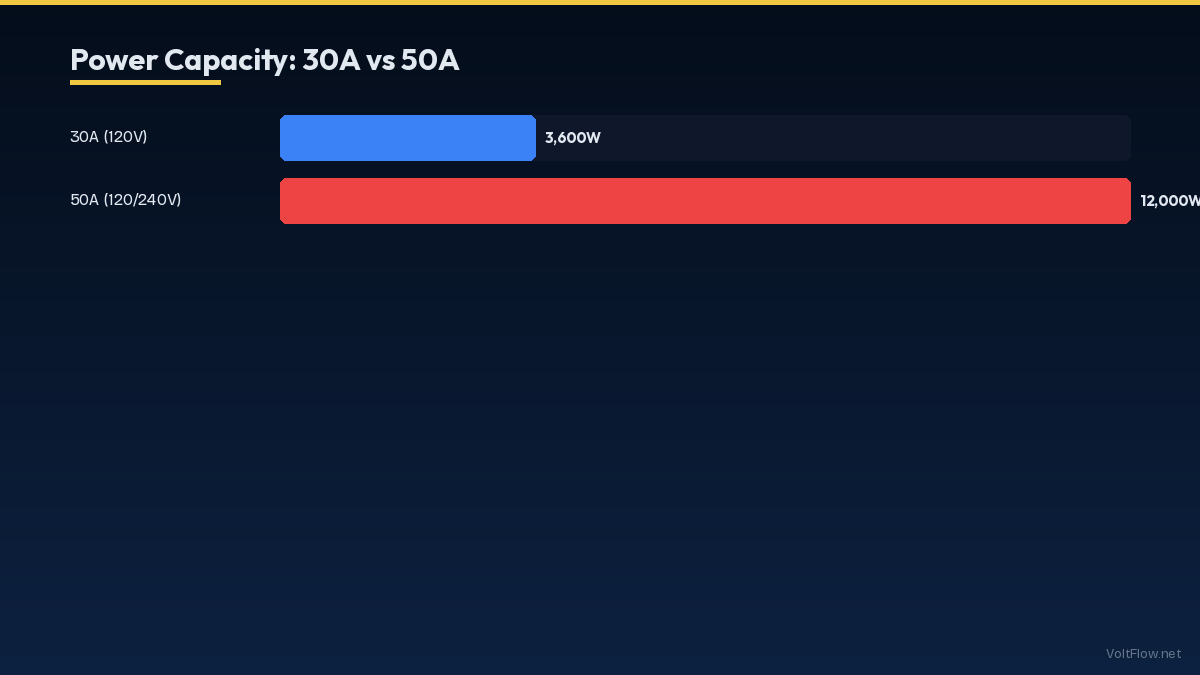
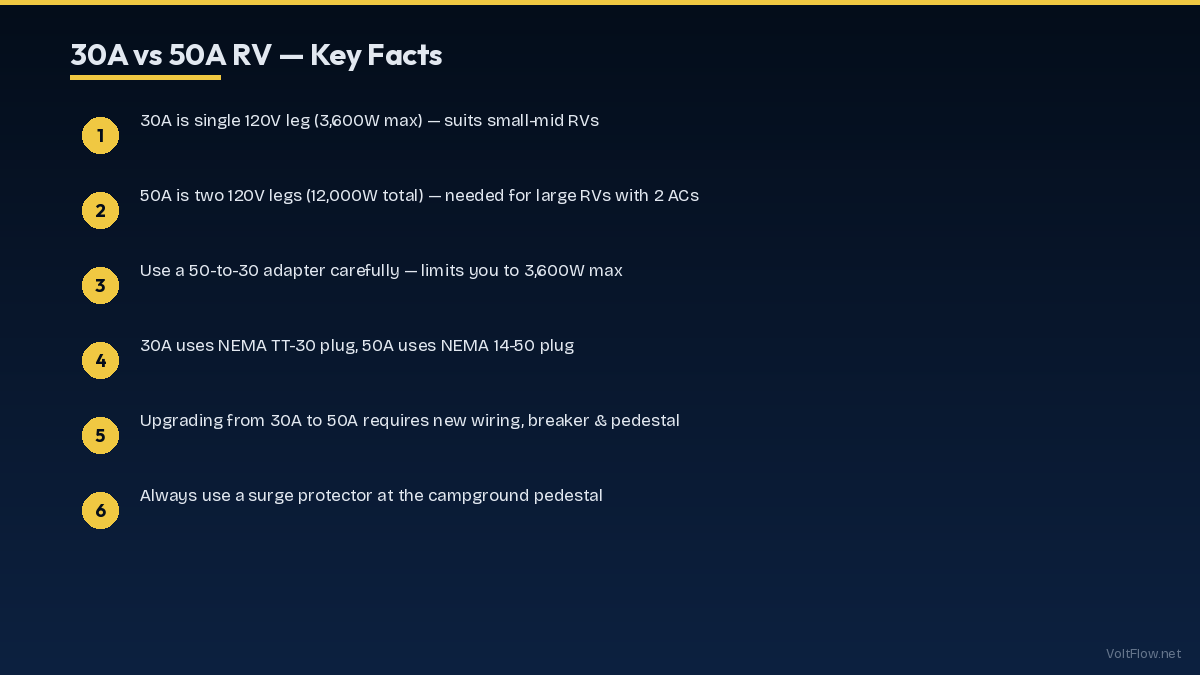
The difference between 30-amp and 50-amp RV electrical service goes far beyond the numbers. A 30-amp RV runs on a single 120-volt circuit delivering 3,600 watts, while a 50-amp RV runs on two 120-volt legs delivering 12,000 watts total — more than triple the power capacity. Understanding this difference is essential for wiring your home RV hookup, choosing adapters, and avoiding overloaded circuits that damage your RV electrical system.
Understanding the Fundamental Difference: 30A vs 50A
The most critical difference between 30-amp and 50-amp RV service is not simply the amperage — it is the voltage configuration. A 30-amp RV service uses a single 120-volt hot leg, one neutral, and one ground. This is a standard single-pole circuit identical in concept to a household 120-volt outlet, just with higher amperage capacity. The maximum available power is 30 amps times 120 volts equals 3,600 watts. Every appliance in a 30-amp RV shares this single 3,600-watt pool of power. A 50-amp RV service uses two separate 120-volt hot legs, one shared neutral, and one ground. Each hot leg delivers 50 amps at 120 volts for 6,000 watts, and the two legs together provide 12,000 watts total. This is similar in concept to your home main panel, which also receives two 120-volt legs that combine to create 240 volts for large appliances while providing separate 120-volt circuits for everything else. Inside a 50-amp RV, the two legs feed separate breaker panels. One leg might power the front air conditioner, microwave, and bedroom outlets while the other feeds the rear air conditioner, water heater, and kitchen outlets. This distribution means you can run two air conditioners and a microwave simultaneously — something impossible on 30-amp service. The plug configurations are completely different and intentionally non-interchangeable. A 30-amp RV plug is a NEMA TT-30P with three flat prongs in a specific triangular arrangement. A 50-amp RV plug is a NEMA 14-50P with four prongs: two hots, one neutral, and one ground arranged in a distinctive pattern. You cannot accidentally plug a 50-amp cord into a 30-amp outlet or vice versa without an adapter. The physical difference prevents dangerous mismatches, though adapters are readily available and commonly used when a campsite offers a different service than your RV requires. Understanding this two-leg architecture is essential for safe adapter use because adapting from 50 to 30 amps means losing one entire leg of power, cutting your available wattage by more than half and potentially leaving appliances on the unpowered leg without service.
What You Can Run on Each Service Level
The practical impact of 30-amp versus 50-amp service comes down to which appliances you can operate simultaneously. Knowing the wattage of common RV appliances helps you manage your electrical load and avoid tripping breakers. On 30-amp service with 3,600 watts available, a single rooftop air conditioner draws 1,200-1,800 watts depending on the unit. A microwave draws 1,000-1,500 watts. An electric water heater draws 1,200-1,400 watts. A residential refrigerator draws 400-800 watts when the compressor runs. A hair dryer draws 1,000-1,875 watts. A coffee maker draws 800-1,200 watts. The math becomes clear quickly: you can run the air conditioner and the refrigerator simultaneously (about 2,400 watts), but adding a microwave (1,200 watts) pushes total demand to 3,600 watts, right at the limit. Running the AC, microwave, and hair dryer simultaneously is impossible on 30-amp service — the breaker trips instantly. Managing a 30-amp RV requires constant awareness of which appliances are running. Most experienced 30-amp RV owners develop habits like turning off the AC before using the microwave, using the propane water heater instead of electric, and avoiding running the coffee maker and toaster at the same time. Some 30-amp RVs include energy management systems that automatically shed loads when demand approaches the 30-amp limit, turning off the water heater when the AC kicks on, for example. On 50-amp service with 12,000 watts available, the picture changes dramatically. You can run two air conditioners simultaneously (3,200 watts combined), the electric water heater (1,400 watts), the microwave (1,200 watts), the refrigerator (600 watts), and still have 5,600 watts of headroom for hair dryers, TVs, computers, and other accessories. This abundance of power is why larger RVs, fifth wheels, and diesel pushers come equipped with 50-amp service — they need two AC units to cool their larger floor plans, and their more residential-style amenities demand more simultaneous power. Even on 50-amp service, you need to balance loads between the two legs. If one leg is heavily loaded with both air conditioners and the microwave while the other leg has only the refrigerator, the loaded leg can trip its 50-amp breaker even though the total system is well under 12,000 watts. Well-designed RVs distribute heavy loads between the two legs, but aftermarket modifications and plug-in appliances can create unbalanced situations.
Wiring a 30-Amp RV Outlet at Home
Installing a 30-amp RV outlet at your home is a straightforward electrical project that provides the convenience of plugging in your RV for maintenance, battery charging, and pre-trip preparation without running a generator. The outlet you need is a NEMA TT-30R, a 30-amp 125-volt receptacle specifically designed for RV connections. This outlet has a distinctive configuration with one L-shaped hot slot, one straight neutral slot, and one U-shaped ground slot. Do not substitute a NEMA 10-30 dryer outlet or any other 30-amp outlet — the pin configurations are different and using the wrong outlet creates safety hazards. The circuit requires a 30-amp single-pole breaker in your panel, 10 AWG copper NM-B cable (10/2 with ground) for interior runs or 10 AWG THWN in conduit for exterior runs, and the TT-30R outlet mounted in a weatherproof outdoor box if installed outside. Total materials cost is approximately $60-$100 for the breaker, wire (25-50 foot run), outlet, and box. Professional installation runs $200-$500 depending on wire run distance. For outdoor installations, the NEC requires the outlet to be protected by a GFCI breaker or GFCI outlet, installed in a weatherproof while-in-use cover that protects the connection while the RV cord is plugged in, and mounted at a height accessible for RV cord connections, typically 18-24 inches above ground level. The wire run from your panel to the outdoor outlet location determines both the difficulty and cost of installation. If your panel is on an exterior wall of the garage adjacent to where you park your RV, the run might be only 10-15 feet — a simple project. If the panel is in the basement on the opposite side of the house, the run could be 75-100 feet and require multiple turns through walls and the attic. For runs over 75 feet with 10 AWG copper, check the voltage drop calculation. At 30 amps and 100 feet on 10 AWG, the voltage drop is approximately 4.7 percent on 120 volts, exceeding the 3 percent recommendation. Consider upsizing to 8 AWG copper for runs approaching or exceeding 100 feet. The extra wire cost is about $1 more per foot, adding $75-$100 to the project for dramatically better performance.
Wiring a 50-Amp RV Outlet at Home
A 50-amp RV outlet provides full-service power for your RV and doubles as a useful high-power outlet for welders, plasma cutters, and other 240-volt workshop equipment with the right adapter. The outlet is a NEMA 14-50R, the same four-prong outlet used for electric ranges and many EV chargers. The circuit requires a 50-amp double-pole breaker, 6 AWG copper NM-B cable (6/3 with ground) for interior runs or 6 AWG THWN in conduit for exterior runs, and the NEMA 14-50R outlet in an appropriate enclosure. Materials cost approximately $120-$200 for a typical 30-50 foot run. Professional installation runs $500-$1,200 depending on complexity and wire run length. The 50-amp RV circuit is a 120/240-volt circuit, meaning it provides both 240 volts between the two hot legs and 120 volts from each hot leg to neutral. This is exactly like the wiring for an electric range. The breaker takes two adjacent spaces in the panel as a double-pole unit, and the cable has two hot conductors (black and red), one neutral (white), and one ground (bare or green). At the outlet, the black wire connects to one hot terminal, the red to the other, the white to the neutral terminal, and the bare or green to the ground terminal. Polarity matters — reversing hot and neutral creates a dangerous condition. Always verify polarity with a circuit tester before plugging in your RV. For outdoor installations, follow the same weatherproofing requirements as the 30-amp outlet: GFCI protection, while-in-use cover, and appropriate mounting height. Note that 50-amp GFCI breakers are significantly more expensive than standard breakers at $100-$150 compared to $20-$30 for a standard 50-amp double-pole breaker. Voltage drop is less of a concern on 50-amp 240-volt circuits because the higher voltage reduces the percentage drop. At 50 amps and 100 feet on 6 AWG copper, the voltage drop is approximately 3.2 percent on 240 volts — just over the 3 percent recommendation. For runs under 80 feet, 6 AWG copper stays within the recommendation. Longer runs should use 4 AWG copper. If you are deciding between a 30-amp and 50-amp outlet for your home RV hookup and have a 50-amp RV, always install the 50-amp outlet. Running your 50-amp RV on a 30-amp outlet through an adapter works for light loads but severely limits your capabilities. If you have a 30-amp RV but might upgrade in the future, installing the 50-amp outlet now costs only $50-$100 more in materials and provides full compatibility with either RV type using an inexpensive step-down adapter.
Adapters and Power Management Between Services
Adapters let you connect your RV to a service level different from its native rating, but they come with important limitations and safety considerations that every RV owner should understand. A 50-amp to 30-amp adapter, commonly called a dogbone adapter because of its shape, allows a 50-amp RV to connect to a 30-amp outlet. The adapter has a NEMA 14-50P plug on one end and a NEMA TT-30R receptacle on the other, with internal wiring that feeds both legs of the 50-amp RV from the single 30-amp source. This means your RV operates on only 3,600 watts instead of 12,000 watts. Both hot legs inside the RV receive the same 120-volt source, so all outlets work, but total capacity is limited to 30 amps. You can typically run one air conditioner and basic loads, but not two ACs or the AC with the electric water heater and microwave simultaneously. Quality 50-to-30 adapters cost $20-$40 and are essential gear for any 50-amp RV owner because not all campsites offer 50-amp pedestals. A 30-amp to 50-amp adapter does the reverse, allowing a 30-amp RV to connect to a 50-amp outlet. The adapter has a NEMA TT-30P plug and a NEMA 14-50R receptacle. This adapter does not increase your RV power capacity — you are still limited to 30 amps and 3,600 watts because your RV internal wiring and breaker panel are sized for 30 amps. The adapter simply matches the plug shapes. An important safety concern with adapters is the potential for overloading the 30-amp side of the connection. Some 50-amp to 30-amp adapters do not include a built-in 30-amp breaker, relying on the campsite pedestal breaker for protection. If the campsite 30-amp breaker is faulty or oversized, your adapter cord could overheat. Purchase adapters with built-in circuit protection or verify the campsite breaker is functioning correctly. Surge protectors are essential accessories regardless of service level. A quality RV surge protector monitors voltage, detects open grounds, reversed polarity, and voltage spikes, and disconnects your RV from dangerous power conditions. Progressive Industries, Southwire, and Hughes Autoformers make respected RV surge protectors. The portable models cost $100-$250 and plug between the campsite pedestal and your RV cord. Hardwired models install permanently inside the RV for $250-$400. Given that a single voltage spike can damage thousands of dollars in RV electronics, a surge protector is the most cost-effective insurance you can buy.
Cost Comparison and Which Service to Choose
The cost difference between installing 30-amp and 50-amp service at your home or RV site is modest compared to the capability difference, making the decision straightforward in most cases. A 30-amp RV outlet installation costs $200-$500 total with professional installation. Materials include a 30-amp single-pole breaker at $8-$12, 10/2 NM-B cable at $1.50-$2 per foot, a NEMA TT-30R outlet at $12-$18, and a weatherproof box and cover at $15-$25. The circuit uses one breaker space in your panel. A 50-amp RV outlet installation costs $500-$1,200 total with professional installation. Materials include a 50-amp double-pole breaker at $20-$30, 6/3 NM-B cable at $3.50-$5 per foot, a NEMA 14-50R outlet at $15-$20, and a weatherproof box and cover at $20-$30. The circuit uses two breaker spaces in your panel. The practical difference in materials cost for a 40-foot wire run is approximately $120-$160. Professional labor costs are similar for both since the work scope is nearly identical: run cable, install breaker, mount outlet. The total cost difference between 30-amp and 50-amp is typically $150-$300 for the same wire run distance. For this modest premium, you get three times the power capacity and compatibility with both 30-amp and 50-amp RVs. If you currently own a 30-amp RV, the 50-amp outlet still makes sense because of future flexibility. If you upgrade your RV to a 50-amp model, you avoid rewiring. If you sell the home, the 50-amp outlet is more attractive to buyers with RVs. If you want to use the outlet for other purposes like powering workshop equipment or an EV charger with an adapter, the 50-amp outlet is far more versatile. The only scenario where a 30-amp outlet makes clear financial sense is when you are certain you will never need 50-amp service, your panel has only one available breaker space, or the wire run is extremely long and the cost difference for the heavier 6 AWG cable versus 10 AWG becomes significant. For runs over 100 feet, the cable cost difference grows to $300-$500, which might shift the calculation for budget-constrained projects. When wiring RV parks or building rental properties with multiple RV sites, the standard practice is to install 50-amp pedestals at every site. The incremental cost per site is minimal when multiplied across many sites, and 50-amp service attracts a wider range of RV renters. Many RV parks also include a 30-amp outlet and a standard 20-amp household outlet on each pedestal for maximum flexibility.